JohnnyEnglish tutorial Creating a new Urt5 map
Contents
Introduction
If you wish to follow along with this tutorial, I have provided a Blender file that we use in this section of the tutorial, please visit the tutorial downloads page and download the tutorial Blender files.
Starting out
Firstly, I'm going to assume you have a fully tested idea for a map, perhaps you've previously built a rough version and tested it on Urt4 and now you want to build it for Urt5. For this tutorial I decided to make a map very much like dressingroom, a small 2x2 fun map, mirrored.
This tutorial will not teach you how to use Blender or any other 3d tool, but what I demonstrate should be transferrable as a technique to whatever tool you decide to use.
Blank page
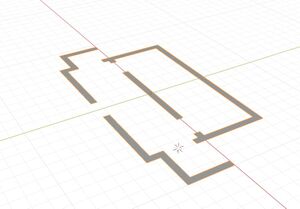
Because I know how large I want the map to be I generally start with a 2d version of the map in blender, start with a plane and extrude it around to get the basic layout. I work with measurement unit's in centimetre.
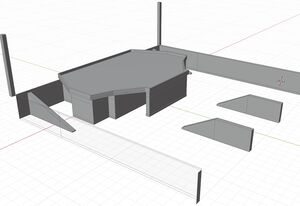
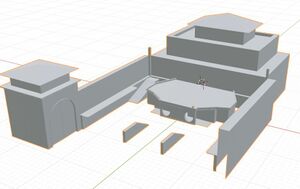
Eventually, the 2d shape can be extruded to make walls, then ceilings and roofs constructed, as a single mesh or as multiple parts, whichever is easiest.
Personally, I like to test out my work in a game environment early on during development, your views may differ, you may decide to perfect your map before moving it to the next level but I prefer to know in advance of adding detail of any problems so I can change them easily with relatively blocky work. For me mapping is very much an iterative process, I know version 1 will look terrible and that version 32 will look outstanding. The workflow between your 3d editor (Blender in this case) and UE4 is such that it encourages this iteration so that updating mesh with more detailed mesh is relatively simple.
I would suggest working your map to this level of detail and no more before proceeding to the next stage (chopping up)
Chopping your mesh
I'm sure there is a more technical name for this process, I have no idea what it is, I call this part of my process chopping.
What that means is that I have a pretty 3d model in Blender but it's not really suitable to be used in UE4, here's why.
UE4 needs to know how to apply textures and lightmaps to the mesh you create. UE4 needs to identify a material slot in your mesh (or multiple materials), for this example I'm going to keep things simple and treat each part of mesh with a separate material as a single item.
So, for example. A part of mesh which will be brick will need to be separated from the parts which are the window frames, and those parts will need to be separated from the glass. You should also consider that the default lightmap size per mesh is 64x64 pixels, that is to shade a 2mx2m object.
Understanding these things will help identify how to break down your model into separate parts, it's generally guess work and after some practice you begin to appreciate how large to make your parts.
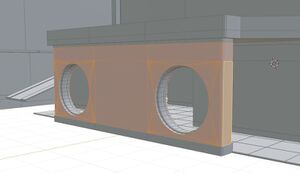
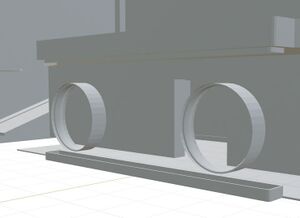
In this case I've decided I want this wall to be a single mesh part with a rough plaster or concrete render, I want it to be separate from the base part and I would like a decorative border along it's top edge, so I separate this part. In Blender this process would be:
- Select the faces you wish to separate
- Press P to separate those faces to a new mesh.
- Repeat until finished.
So I can see clearly, I'll generally hide that separated part.
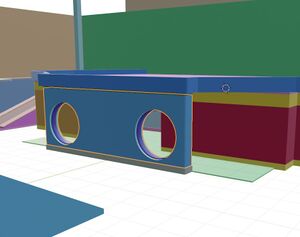
I repeat this process until I've chopped the entire mesh into sensible parts. I can later refine these parts, but as you can see from this screenshot, each part has a different colour.
Please note
Having a lot of small parts in your final map may hinder the performance, the biggest performance hit are the load calls, these load the elements that need to be drawn on every frame (textures, mesh, effects) and construct what you will see. This is balanced by the complexity of the things which are loaded, so you will need to balance the number of items loaded with the complexity of what is loaded. It may be better to have 5 relatively simple objects loaded than to load a single one 10 trillion triangles object. Objects that do not need to be loaded (culled) will obviously improve performace, so a long wall might be split into several smaller sections to aid that culling.
Adding a material slot
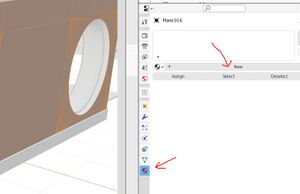
In Blender, it's simple to add a new material to each single mesh. Simply select that part, click the Materials rollout and click Add new, I generally rename these to UE4 style material instance names, so MI_Brick_00 or MI_Wood_01.
UV Unwrapping
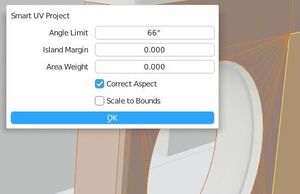
You can spend as long as you like unwrapping mesh parts, or you can use the Blender Smart UV Project, each mesh will need to be unwrapped and the defaults are fine if you use this feature.
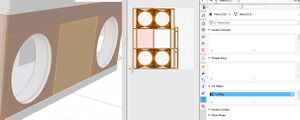
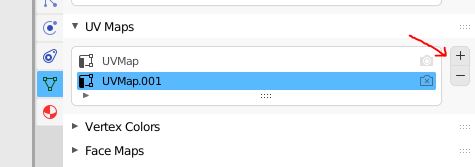
UE4 requires 2 UV maps per mesh, one for the texture co-ordinates and a second for the lightmap. If you prefer, you can have this second UV map generated automatically by UE4 when you import. Personally I prefer to create my own using the blender unwrap option Lightmap Pack which I think works slightly better than the UE4 version, lightmap space is precious imho and every pixel counts.
Remember to create the second UV Map in Blender before unwrapping the lightmap.
Mesh cleanup
Whichever 3d software you decide to use, it's possible to make quite messy mesh. By messy mesh I mean, for example: may have overlapping vertices, overlapping faces, face normals may be flipped or doubled, it may be scaled or rotated in a local space. Any number of minor problems may later cause problems.
So it's important to clean the mesh as much as possible. In Blender the most common tools I use are Merge Vertex by Distance, this removes duplicated element. Additionally, I recommend resetting any rotation and scaling. This will help later when creating better UV Maps. Other tools exist in the Blender mesh clean up sections to delete loose vertices and decimate selected elements, these are worth considering using.
Messy mesh can cause visual problems and UE4 will warn about a variety of problems when you import and when you try to build lighting, trust me it's easier to make clean mesh than to fix bad mesh in UE4.
The lazy way
The previous three stages, adding a material slot, UV Unwrapping and cleaning your mesh are essential but for me, quite tedious, especially during the initial stages of a map build project where I'd quite like to see my map in UE4.
I have made a simple Blender 2.90 (and above) plugin to help automate this process, you can download the The CMM Blender to UE4 tool here.
This tool isn't perfect, it was written over a couple of days and I've often intended to go in and tidy up the python, but not yet bothered. Feel free to fix it up and send me and updated version.
It does however save a great deal of time, especially in the early stages.
Exporting from Blender to FBX
Eventually, it will be time to export your work from Blender in a format compatible with UE4, I generally use .FBX, in fact I've never even tested other formats so I'd be interested to know your experiences with different model formats.
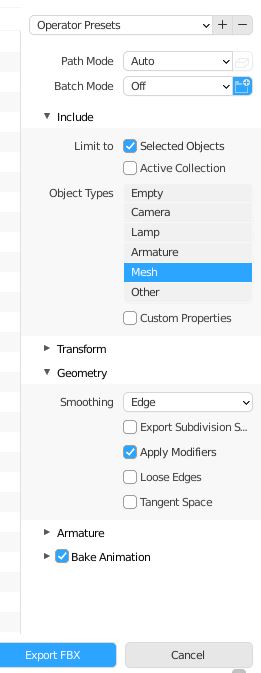
Select the parts you wish to be included and choose File, Export to FBX.
Select the following options for the export:
- Selected objects
- Object Types: Mesh
In the Geometry category
- Smoothing: Edge
- Apply Modifiers
Deviation from these settings may cause import and light build errors and warnings in UE4
Export the .FBX
What now?
Now we have our whole (or half) map in a single .FBX model file and it's ready to move to the next stage of Urt5 mapping, working with UE4.
To continue this tutorial JohnnyEnglish tutorial Working with UE4
