Difference between revisions of "JohnnyEnglish tutorial Creating a new Urt5 map"
(→Blank page) |
(→Blank page) |
||
| Line 7: | Line 7: | ||
==Blank page== | ==Blank page== | ||
| − | [[File:Tut01.JPG| | + | [[File:Tut01.JPG|300px]] |
| − | Because I know how large I want the map to be I generally start with a 2d version of the map in blender, start with a plane and extrude it around to get the basic layout. I | + | Because I know how large I want the map to be I generally start with a 2d version of the map in blender, start with a plane and extrude it around to get the basic layout. I work with measurement unit's in centimetre. |
| + | |||
| + | Eventually, the 2d shape can be extruded to make walls, then ceilings and roofs constructed, as a single mesh or as multiple parts, whichever is easiest. | ||
| + | |||
| + | [[File:Tut02.JPG|300px]] | ||
Revision as of 10:38, 9 August 2021
Starting out
Firstly, I'm going to assume you have a fully tested idea for a map, perhaps you've previously built a rough version and tested it on Urt4 and now you want to build it. For this tutorial I decided to make a map very much like dressingroom, a small 2x2 fun map, mirrored.
This tutorial will not teach you how to use Blender or any other 3d tool, but what I demonstrate should be transferrable as a technique to whatever tool you decide to use.
Blank page
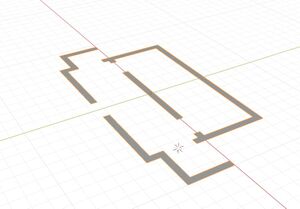
Because I know how large I want the map to be I generally start with a 2d version of the map in blender, start with a plane and extrude it around to get the basic layout. I work with measurement unit's in centimetre.
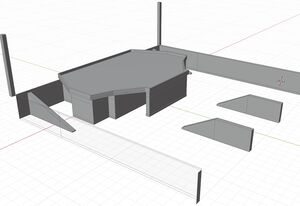
Eventually, the 2d shape can be extruded to make walls, then ceilings and roofs constructed, as a single mesh or as multiple parts, whichever is easiest.

