Difference between revisions of "Mapping:Create your first room"
(→Adding lights) |
m |
||
| (135 intermediate revisions by 2 users not shown) | |||
| Line 1: | Line 1: | ||
| − | { | + | ==Before you start== |
| + | {| width="100%" style="padding-left:5%;" | ||
| + | |style="padding-right:5%;vertical-align:top"| | ||
| + | I'm assuming before this tutorial begins that you have a correctly configured Radiant, it doesn't matter which, the principles are pretty similar in all versions. | ||
| + | If it doesn't look slightly similar to this or If you've not yet configured Radiant please see one of the sections about installing | ||
| − | + | * [[:Category:Radiant]] | |
| − | |||
| + | If you're happy that your radiant shares similarities with the image above you may now close radiant. | ||
| − | |||
| − | |||
| − | |||
| − | + | '''Before you begin any mapping project''' you should choose a name for the project and create an empty folder in your textures folder with that name. For the purpose of this tutorial our map is called '''myfirstmap''', it's short and snappy and easy to remember. | |
| − | |||
| − | |||
| − | |||
| − | |||
| − | |||
| − | |||
| − | Before you begin any mapping project you should choose a name for the project and create an empty folder in your textures folder with that name. For the purpose of this tutorial our map is called '''myfirstmap''', it's short and snappy and easy to remember. | ||
Create a folder in your ''mapping/textures'' folder called ''myfirstmap'' | Create a folder in your ''mapping/textures'' folder called ''myfirstmap'' | ||
| Line 33: | Line 27: | ||
if not, add one. Save the file and close the editor. | if not, add one. Save the file and close the editor. | ||
| − | |||
| − | |||
| − | + | | | |
| + | [[File:Screenshot.png|500px]] | ||
| + | |} | ||
| − | + | ||
| + | '''Please note''': This and all other tutorial maps can be loaded from the wiki. This map can be downloaded [[http://www.custommapmakers.org/storage/resources/tutorial1.pk3 Here]] | ||
==Textures / images== | ==Textures / images== | ||
| Line 54: | Line 49: | ||
Save these as '''water.jpg''' and '''watercaulk.jpg''' | Save these as '''water.jpg''' and '''watercaulk.jpg''' | ||
| − | ==Create a | + | We will not use these textures nor the following shaders for this tutorial but in later if you follow this tutorial, we will. |
| + | |||
| + | == Create a shader file == | ||
In your mapping/scripts folder create a new file called myfirstmap.shader and open it with a text editor. | In your mapping/scripts folder create a new file called myfirstmap.shader and open it with a text editor. | ||
Paste in the following lines, they're not important at this stage but will be needed in another tutorial later. | Paste in the following lines, they're not important at this stage but will be needed in another tutorial later. | ||
| − | + | ||
| − | |||
textures/myfirstmap/watercaulk | textures/myfirstmap/watercaulk | ||
{ | { | ||
| Line 72: | Line 68: | ||
surfaceparm water | surfaceparm water | ||
} | } | ||
| − | + | ||
| + | |||
textures/myfirstmap/ladder | textures/myfirstmap/ladder | ||
{ | { | ||
| Line 89: | Line 86: | ||
Save this file and close the text editor, the preparation work is complete it's now time to open radiant. | Save this file and close the text editor, the preparation work is complete it's now time to open radiant. | ||
| − | |||
| − | |||
| − | |||
| − | |||
| − | |||
| − | |||
| − | |||
| − | |||
| − | |||
| − | |||
| − | |||
| − | |||
| − | |||
| − | |||
| − | |||
| − | |||
| − | |||
| − | |||
| − | |||
| − | |||
| − | |||
| − | |||
| − | |||
| − | |||
| − | |||
| − | |||
| − | |||
| − | |||
| − | |||
| − | |||
| − | |||
| − | |||
| − | |||
| − | |||
| − | |||
| − | |||
| − | |||
| − | |||
| − | |||
| − | |||
| − | |||
| − | |||
| − | |||
| − | |||
| − | |||
| − | |||
| − | |||
| − | |||
| − | |||
| − | |||
| − | |||
| − | |||
| − | |||
| − | |||
| − | |||
| − | |||
| − | |||
| − | |||
| − | |||
| − | |||
| − | |||
| − | |||
| − | |||
| − | |||
| − | |||
| − | |||
| − | |||
| − | |||
| − | |||
| − | |||
| − | |||
| − | |||
| − | + | ==Where to start== | |
| + | {| width="100%" style="padding-left:5%;" | ||
| + | |style="padding-right:5%;vertical-align:top"| | ||
| − | + | Fire up your radiant - if you managed to install a suitable version you should see something similar to the example on the right. | |
| − | + | Right click on your 2d view - the [[Entities:What is an entity|entities]] that you can add to your map will be listed. | |
| − | + | We will add an [[Entities:Info#info_player_start|info_player_start]], so select the '''info''' -> '''info_player_start''' | |
| − | + | This will add a small (possibly red) rectangle to your map. | |
| − | + | You should now be able to move this item around in the 2d view by dragging with the mouse. | |
| − | + | You can change the view between XYZ views using Ctrl+Tab. | |
| − | + | Move the info_player_start so it's where you'd like it to be. | |
| − | + | | | |
| − | |||
| − | + | [[file:tut1.png|500px]] | |
| − | + | |} | |
| − | + | ==Create your first brush== | |
| + | {| width="100%" style="padding-left:5%;" | ||
| + | |style="padding-right:5%;vertical-align:top"| | ||
| − | + | Press Esc to deselect all objects, you should really get used to doing this. After every action, press ESC. | |
| − | |||
| − | + | '''Set your grid size''' | |
| − | + | Initially we'll work with a 8 unit grid. The grid settings are selectable from the main menu (grid -> 8). Initially there is no reason to use any other grid setting, later - when you become more used to mapping you'll choose other grid settings but for now work with 8 units. | |
| − | |||
| − | + | Change the ''2d view'' so that you're looking down on your world, you can tell when you're looking from the top down onto your map by the small indicator in the top right of the 2d plane. '''Y/Z''' is the top down view. | |
| − | + | Working in the Y/Z plane drag out a rectangle to form a floor -- this is your first [[Mapping:What is a brush|brush]]. For the first 20 minutes or so you'll struggle to find the brush you just created in the 3d view but persevere | |
| − | + | You should aim to create a floor roughly the same size as the example. Because you're working with the 8 grid you should work with walls/floors/ceilings 2 blocks (16 units) thick. | |
| − | + | | | |
| + | [[File:Tut12.png|500px]] | ||
| + | |} | ||
| − | + | ==Work with caulk== | |
| + | {| width="100%" style="padding-left:5%;" | ||
| + | |style="padding-right:5%;vertical-align:top"| | ||
| + | When radiant first loads it uses (by default) a "texture" called no-draw. It is possible to change this. | ||
| − | [[ | + | When constructing your map it is generally better to work with caulk. Caulk is a common [[Mapping:What is a shader|shader]] that is considered special. All non-visible areas of your map should use caulk. For this reason it's best to make all brushes using caulk and then, '''texture only what will be seen'''. |
| − | + | Select your first brush, the floor - Shift+Right Click will select a brush in either the 2d or 3d window. | |
| − | + | With the brush selected click on the caulk texture (the pink one in the texture window). The entire brush will be textured with the pink caulk. | |
| − | + | Confirm your floor is 16 units (2 blocks high) by changing your 2d view Ctrl+Tab | |
| − | + | Check that your floor is just below the info_player_start and you've not embedded the entity inside the floor. | |
| − | + | | | |
| + | [[File:Tut13.png|500px]] | ||
| − | + | [[File:Tut14.png|500px]] | |
| − | |||
| − | + | |} | |
| − | + | ==Add the walls== | |
| + | {| width="100%" style="padding-left:5%;" | ||
| + | |style="padding-right:5%;vertical-align:top"| | ||
| − | + | Unselect all items ('''Press Esc''') - remember to do this before you start a new action. | |
| − | + | With the 2d view in the Z/Y plane create a new brush (drag in 2d view) and align this new brush (your first wall) so that it's aligned with the floor brush we created earlier. | |
| − | + | '''Remember the following for all brush work''' | |
| − | + | *Always work with caulk | |
| + | *Never overlap brushes | ||
| + | *Work with 8 units for all brushwork until you are more advanced | ||
| + | *Drag outside a brush to resize | ||
| + | *Drag inside a brush to move it | ||
| − | + | With a brush selected you can clone it (make a copy) by pressing '''space'''. This will clone the original brush and move it 1 unit in the x/y planes away from the original. It will also be the selected item. | |
| − | + | Drag this cloned wall brush to the opposite side of the room. Align the brush so it's not overlapping another brush as in the example. | |
| − | + | In the same manner as you created the second wall, by cloning the first, continue to create the brushes for your walls. | |
| − | |||
| − | + | [[File:Tut17.png|200px]] [[File:Tut18.png|200px]] | |
| − | |||
| − | + | | | |
| + | [[File:Tut15.png|500px]] | ||
| − | + | [[File:Tut16.png|500px]] | |
| + | |} | ||
| − | + | ==Add the roof== | |
| + | {| width="100%" style="padding-left:5%;" | ||
| + | |style="padding-right:5%;vertical-align:top"| | ||
| − | + | Clone the brush you created for the floor and move this up to form the ceiling | |
| − | + | You should now have constructed an enclosed box - no brushes should overlap and all brushes are 2 squares (16 units) thick. | |
| − | + | Review your work and confirm it matches the example image on the right. | |
| − | + | For the next stage you will need to move inside the box you've created in the 3d view. Navigation in the 3d view is initially complicated, if you find it impossible - try inverting your mouse. This is a radiant option. | |
| − | + | When you've managed to navigate inside the room we'll begin to texture our room. | |
| − | + | | | |
| + | [[File:Tut19.png|500px]] | ||
| + | |} | ||
| − | |||
| − | |||
| − | |||
| − | + | ==Texturing your room== | |
| + | {| width="100%" style="padding-left:5%;" | ||
| + | |style="padding-right:5%;vertical-align:top"| | ||
| − | + | Textures are applied to '''faces''' - not '''brushes'''. It is possible to texture an entire brush and sometimes you may need to do this but the general rule is to work with faces. | |
| − | + | When texturing we need to select only the faces that will be seen by the player. | |
| − | + | In our example room we have 6 faces - 4 walls, the floor and the ceiling. | |
| − | |||
| − | + | '''Press Esc to deselect''' | |
| − | + | To select a single face you should Shift+Click in the 3d window with your cursor over the face you wish to select. | |
| − | + | The face will show it's been selected by changing colour. | |
| − | |||
| − | + | You can de-select the face by Shift+Clicking again on the same brush or by pressing Esc. | |
| − | You | ||
| − | + | Load your map textures - from the main menu select '''Textures''' and then click '''Directory list''' | |
| − | + | From this list select '''myfirstmap''' - this will load all the images in the matching textures folder and any shaders defined for this name. | |
| − | + | In the '''textures window''' you will see the ''plaster.jpg'' and ''brick.jpg'' images you downloaded earlier and saved to your'' mapping/textures/myfirstmap'' folder. | |
| − | |||
| − | + | Select a wall face - click the brick texture in the textures window and you'll see the brick texture applied to the selected wall. | |
| − | + | It's possible to select multiple faces - press Ctrl+Shift and click as you select multiple faces. | |
| − | |||
| − | + | [[File:Tut112.png|200px]] [[File:Tut114.png|200px]] | |
| − | |||
| − | + | Select all the remaining wall faces (Ctrl+Shift Click in the 3d window) and then click the brick texture to apply this to your walls. | |
| − | + | To finish texturing, select the floor and ceiling faces and click the ''plaster.jpg'' image in the textures window. | |
| − | + | You should now have a fully textured map. | |
| − | + | [[File:Tut116.png|200px]] | |
| − | [[File: | + | | |
| + | [[File:Tut110.png|500px]] | ||
| − | + | [[File:Tut111.png|500px]] | |
| − | + | [[File:Tut115.png|500px]] | |
| + | |} | ||
| − | |||
| − | + | ==Let there be light== | |
| + | {| width="100%" style="padding-left:5%;" | ||
| + | |style="padding-right:5%;vertical-align:top"| | ||
| − | + | Without lights and lighting effects your map will be completely dark. Lights add more than illumination to your map, they also add atmosphere and depth. | |
| − | + | Right click in the 2d window to ''create a light'' - select the '''light''' entity from the context menu. | |
| − | + | You will be prompted to enter a value for the light. Enter the value of '''200''' | |
| − | + | Lights can be added with a very low intensity (20-40) to add interest to your map, | |
| − | + | Lights with intensities between 100-300 are good for general lighting. | |
| − | + | It's better in many ways to create a map with many lower intensity lights than 1 or 2 large lights. | |
| − | + | Move your light so it's not too close to the walls, floors or ceiling. | |
| − | + | It's possible to set a light colour, most lights in the real world are not white. When sunlight hits grass for example the light reflected from the grass is green, so in places where there is grass it would make sense to add a number of small subtle lights (20-30 intensity) to represent this. | |
| − | + | '''Press K''' to open the colour picker. | |
| − | + | Select a colour you like - I chose a slightly yellowish light that might be similar to the light you might get from an old light bulb. | |
| − | + | With the light still selected (select it if not) we will copy (clone) this light. | |
| − | + | Press Space to clone an item or brush, move the new light to the diagonally opposite side of the room. | |
| − | + | Feel free to change the colour of this light, '''press K''' to open the colour picker. | |
| − | [[File: | + | [[File:Tut120.png|300px]] |
| − | + | When you're happy with your lights and light colours press Esc to deselect any objects. Your first map is almost complete. | |
| − | [[File: | + | | |
| + | [[File:Tut117.png|500px]] | ||
| − | + | [[File:Tut121.png|500px]] | |
| − | + | |} | |
| − | + | ==Compile your map== | |
| − | |||
| − | == | + | ==Test your map== |
| − | |||
| − | |||
| − | |||
| − | |||
| − | + | The complete map and resources for this map can be downloaded [http://www.custommapmakers.org/storage/resources/tutorial1.pk3 here] | |
| − | + | [[File:Tut122.jpg|800px]] | |
| − | + | [[Category:Mapping]] | |
| − | |||
Latest revision as of 15:22, 13 September 2011
Contents
Before you start
|
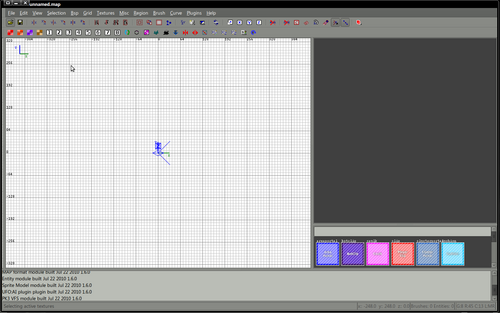
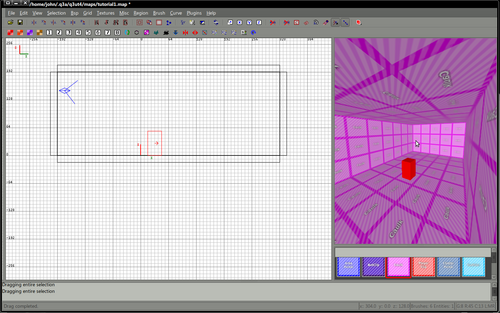
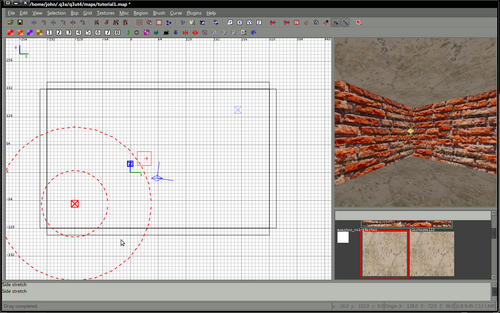
I'm assuming before this tutorial begins that you have a correctly configured Radiant, it doesn't matter which, the principles are pretty similar in all versions. If it doesn't look slightly similar to this or If you've not yet configured Radiant please see one of the sections about installing If you're happy that your radiant shares similarities with the image above you may now close radiant.
Before you begin any mapping project you should choose a name for the project and create an empty folder in your textures folder with that name. For the purpose of this tutorial our map is called myfirstmap, it's short and snappy and easy to remember. Create a folder in your mapping/textures folder called myfirstmap Find your shaderlist.txt file, normally this will be in the mapping/scripts folder. Open this with a text editor. Somewhere in this file, add the single line myfirstmap Confirm that there is a line which reads common if not, add one. Save the file and close the editor.
|
Please note: This and all other tutorial maps can be loaded from the wiki. This map can be downloaded [Here]
Textures / images
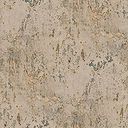
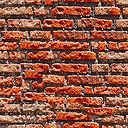
For the purpose of this tutorial you'll need a couple of images. Download these 2 files and save them to your mapping/textures/myfirstmap folder. You created this earlier if you didn't you've been skipping - go back and do it now.
Save these files as plaster.jpg and bricks.jpg -
Additionally download these files and save them to your mapping/textures folder
Save these as water.jpg and watercaulk.jpg
We will not use these textures nor the following shaders for this tutorial but in later if you follow this tutorial, we will.
Create a shader file
In your mapping/scripts folder create a new file called myfirstmap.shader and open it with a text editor.
Paste in the following lines, they're not important at this stage but will be needed in another tutorial later.
textures/myfirstmap/watercaulk
{
   qer_nocarve
   qer_trans 0.40
   qer_editorimage textures/watercaulk.tga
   surfaceparm nodraw
   surfaceparm nolightmap
   surfaceparm nonsolid
   surfaceparm trans
   surfaceparm nomarks
   surfaceparm water
}
textures/myfirstmap/ladder
{
   qer_editorimage textures/ladder.jpg
   qer_trans .40
   surfaceparm ladder
   surfaceparm nodraw
   surfaceparm nolightmap
   surfaceparm nonsolid
   surfaceparm trans
   surfaceparm nomarks
   surfaceparm noimpact
   surfaceparm playerclip
}
Save this file and close the text editor, the preparation work is complete it's now time to open radiant.
Where to start
|
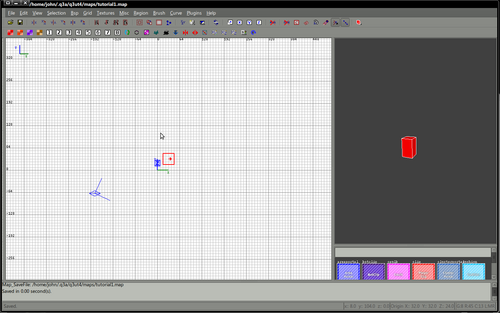
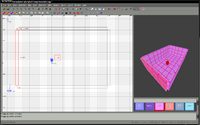
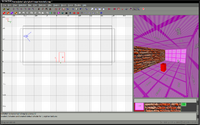
Fire up your radiant - if you managed to install a suitable version you should see something similar to the example on the right. Right click on your 2d view - the entities that you can add to your map will be listed. We will add an info_player_start, so select the info -> info_player_start This will add a small (possibly red) rectangle to your map. You should now be able to move this item around in the 2d view by dragging with the mouse. You can change the view between XYZ views using Ctrl+Tab. Move the info_player_start so it's where you'd like it to be. |
Create your first brush
|
Press Esc to deselect all objects, you should really get used to doing this. After every action, press ESC. Set your grid size Initially we'll work with a 8 unit grid. The grid settings are selectable from the main menu (grid -> 8). Initially there is no reason to use any other grid setting, later - when you become more used to mapping you'll choose other grid settings but for now work with 8 units.
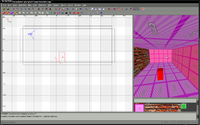
Working in the Y/Z plane drag out a rectangle to form a floor -- this is your first brush. For the first 20 minutes or so you'll struggle to find the brush you just created in the 3d view but persevere You should aim to create a floor roughly the same size as the example. Because you're working with the 8 grid you should work with walls/floors/ceilings 2 blocks (16 units) thick. |
Work with caulk
|
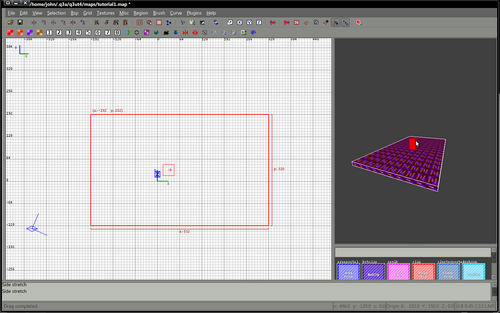
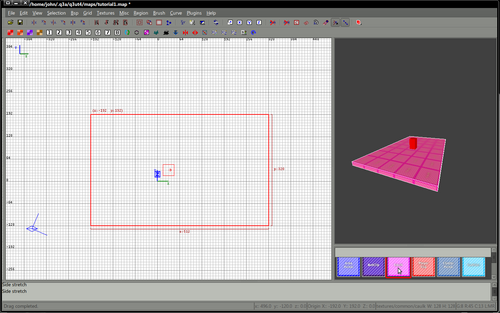
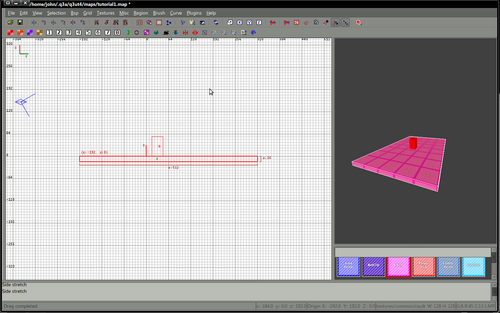
When radiant first loads it uses (by default) a "texture" called no-draw. It is possible to change this. When constructing your map it is generally better to work with caulk. Caulk is a common shader that is considered special. All non-visible areas of your map should use caulk. For this reason it's best to make all brushes using caulk and then, texture only what will be seen. Select your first brush, the floor - Shift+Right Click will select a brush in either the 2d or 3d window. With the brush selected click on the caulk texture (the pink one in the texture window). The entire brush will be textured with the pink caulk. Confirm your floor is 16 units (2 blocks high) by changing your 2d view Ctrl+Tab Check that your floor is just below the info_player_start and you've not embedded the entity inside the floor. |
Add the walls
|
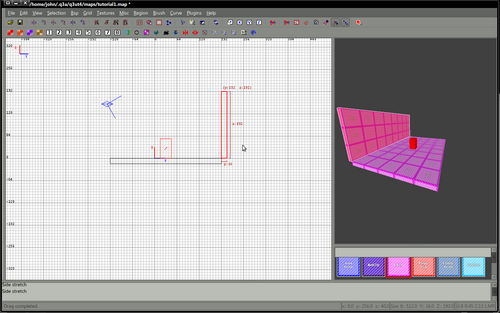
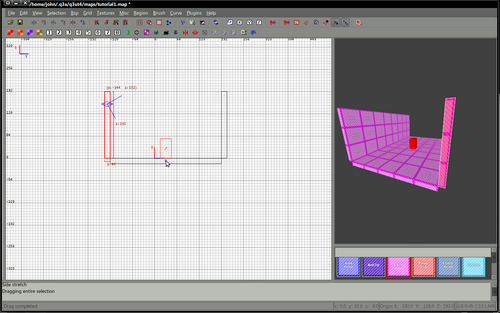
Unselect all items (Press Esc) - remember to do this before you start a new action. With the 2d view in the Z/Y plane create a new brush (drag in 2d view) and align this new brush (your first wall) so that it's aligned with the floor brush we created earlier. Remember the following for all brush work
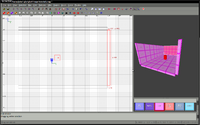
With a brush selected you can clone it (make a copy) by pressing space. This will clone the original brush and move it 1 unit in the x/y planes away from the original. It will also be the selected item. Drag this cloned wall brush to the opposite side of the room. Align the brush so it's not overlapping another brush as in the example. In the same manner as you created the second wall, by cloning the first, continue to create the brushes for your walls. |
Add the roof
|
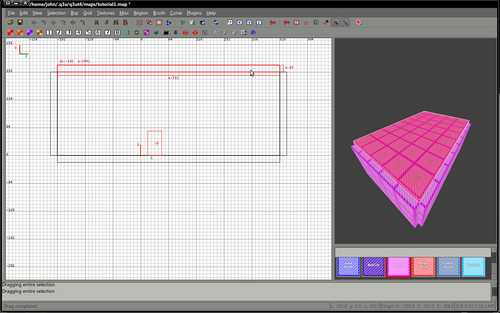
Clone the brush you created for the floor and move this up to form the ceiling You should now have constructed an enclosed box - no brushes should overlap and all brushes are 2 squares (16 units) thick. Review your work and confirm it matches the example image on the right. For the next stage you will need to move inside the box you've created in the 3d view. Navigation in the 3d view is initially complicated, if you find it impossible - try inverting your mouse. This is a radiant option. When you've managed to navigate inside the room we'll begin to texture our room. |
Texturing your room
|
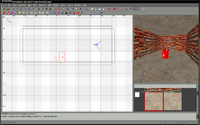
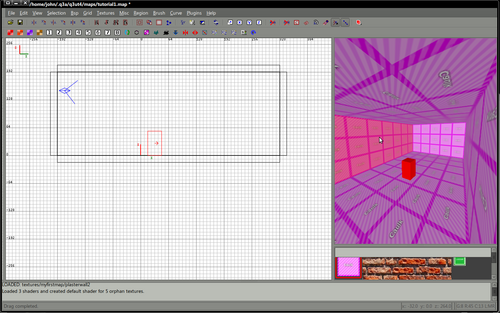
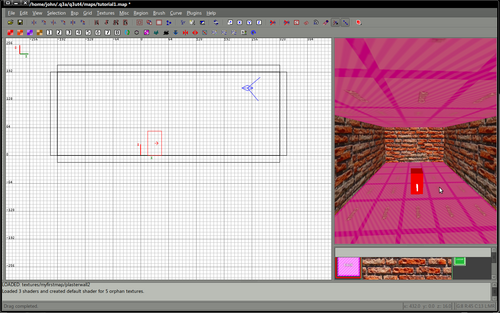
Textures are applied to faces - not brushes. It is possible to texture an entire brush and sometimes you may need to do this but the general rule is to work with faces. When texturing we need to select only the faces that will be seen by the player. In our example room we have 6 faces - 4 walls, the floor and the ceiling. Press Esc to deselect To select a single face you should Shift+Click in the 3d window with your cursor over the face you wish to select. The face will show it's been selected by changing colour. You can de-select the face by Shift+Clicking again on the same brush or by pressing Esc. Load your map textures - from the main menu select Textures and then click Directory list From this list select myfirstmap - this will load all the images in the matching textures folder and any shaders defined for this name. In the textures window you will see the plaster.jpg and brick.jpg images you downloaded earlier and saved to your mapping/textures/myfirstmap folder.
It's possible to select multiple faces - press Ctrl+Shift and click as you select multiple faces. Select all the remaining wall faces (Ctrl+Shift Click in the 3d window) and then click the brick texture to apply this to your walls. To finish texturing, select the floor and ceiling faces and click the plaster.jpg image in the textures window. You should now have a fully textured map. |
Let there be light
|
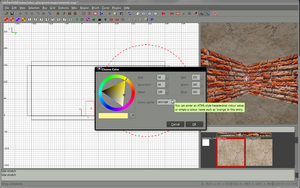
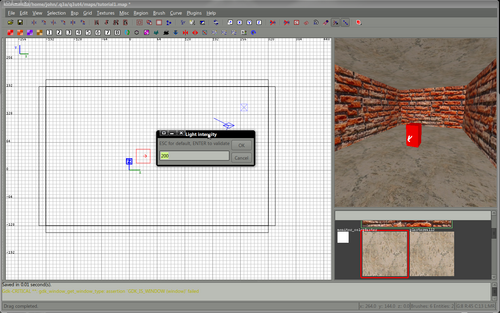
Without lights and lighting effects your map will be completely dark. Lights add more than illumination to your map, they also add atmosphere and depth. Right click in the 2d window to create a light - select the light entity from the context menu. You will be prompted to enter a value for the light. Enter the value of 200 Lights can be added with a very low intensity (20-40) to add interest to your map, Lights with intensities between 100-300 are good for general lighting. It's better in many ways to create a map with many lower intensity lights than 1 or 2 large lights. Move your light so it's not too close to the walls, floors or ceiling. It's possible to set a light colour, most lights in the real world are not white. When sunlight hits grass for example the light reflected from the grass is green, so in places where there is grass it would make sense to add a number of small subtle lights (20-30 intensity) to represent this. Press K to open the colour picker. Select a colour you like - I chose a slightly yellowish light that might be similar to the light you might get from an old light bulb. With the light still selected (select it if not) we will copy (clone) this light. Press Space to clone an item or brush, move the new light to the diagonally opposite side of the room. Feel free to change the colour of this light, press K to open the colour picker. When you're happy with your lights and light colours press Esc to deselect any objects. Your first map is almost complete. |
Compile your map
Test your map
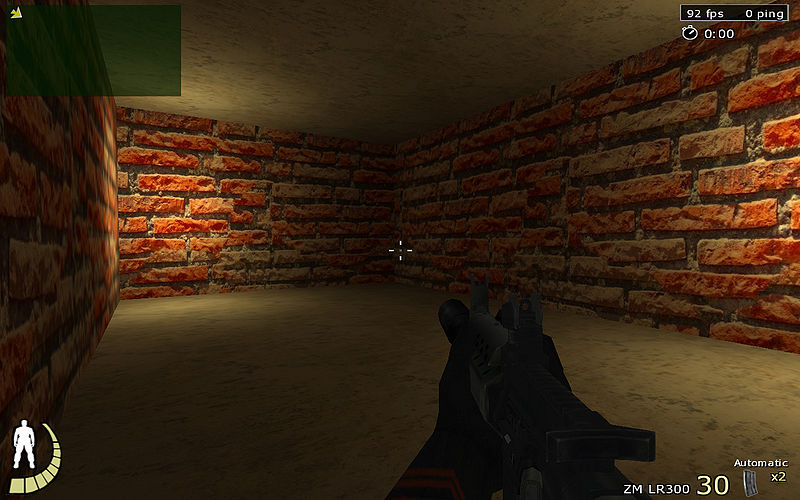
The complete map and resources for this map can be downloaded here
