Difference between revisions of "JohnnyEnglish tutorial Working with UE4 Materials"
| Line 6: | Line 6: | ||
*Right click inside the '''Materials''' folder, we created this folder earlier in the tutorial but if you missed/skipped that, don't worry simply duplicate this file structure and continue. | *Right click inside the '''Materials''' folder, we created this folder earlier in the tutorial but if you missed/skipped that, don't worry simply duplicate this file structure and continue. | ||
| + | |||
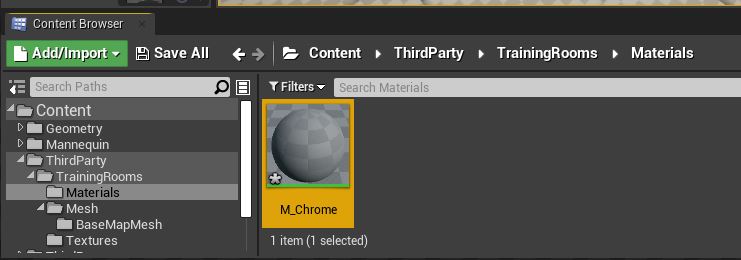
| + | *Create a new Material, name the material '''M_Chrome''', the '''M_''' prefix denotes, in UE4speak, that this object is a material. | ||
[[File:Mat01.JPG]] | [[File:Mat01.JPG]] | ||
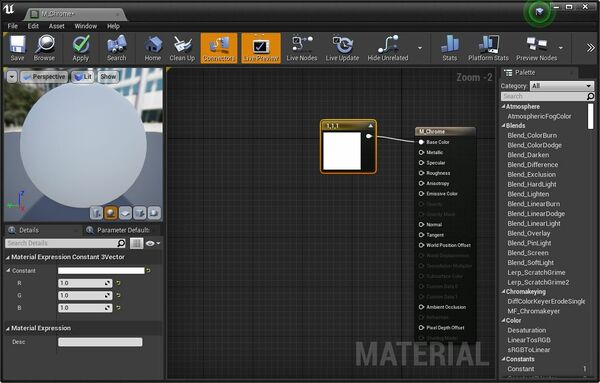
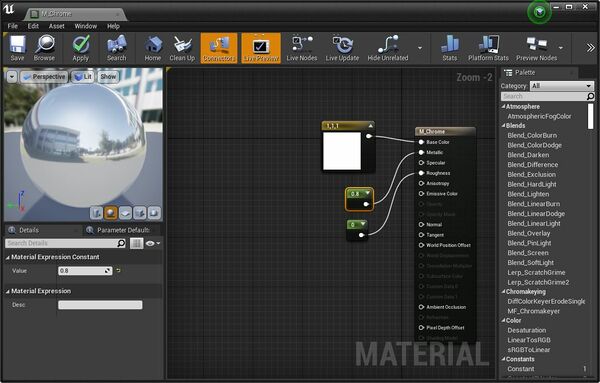
| + | *Double click to open the | ||
| − | [[File:Mat02.JPG]] | + | [[File:Mat02.JPG|600px]] |
| − | [[File:Mat03.JPG]] | + | [[File:Mat03.JPG|600px]] |
Revision as of 07:06, 12 August 2021
UE4 includes a very rich material editor, fortunately it's very easy to use and we'll use it now to start making all the materials we're going to need.
For this tutorial I've chosen to use a concrete theme and for the ground, a mix between sand, grass and pavement.
Let's start with a very simple Chrome material.
- Right click inside the Materials folder, we created this folder earlier in the tutorial but if you missed/skipped that, don't worry simply duplicate this file structure and continue.
- Create a new Material, name the material M_Chrome, the M_ prefix denotes, in UE4speak, that this object is a material.
- Double click to open the


