Mapping:Create your first room
Introduction
This tutorial aims to help you create your first room and, your first map. The tutorial isn't meant to be "the best way", it's been created to introduce you to good practice, neat brushwork and a consideration of a 10 year old engine (soon to be given a new lease of life).
Before we begin
I'm assuming before this tutorial begins that you have a correctly configured radiant, it doesn't matter which, the principles are pretty similar in all versions.
If you've not yet configured radiant please see one of the sections about installing
- links to installing
First steps
Before you begin any mapping project you should choose a name for the project and create an empty folder in your textures folder with that name. For the purpose of this tutorial our map is called myfirstmap, it's short and snappy and easy to remember.
Create a folder in your mapping/textures folder called myfirstmap
Find your shaderlist.txt file, normally this will be in the mapping/scripts folder. Open this with a text editor.
Somewhere in this file, add the single line
myfirstmap
Save the file and close the editor
Textures / images
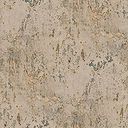
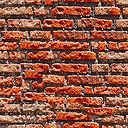
For the purpose of this tutorial you'll need a couple of images. Download these 2 files and save them to your mapping/textures/myfirstmap folder
Save these files as plaster.jpg and bricks.jpg -
Additionally download these files and save them to your mapping/textures folder
Save these as water.jpg and watercaulk.jpg


