Difference between revisions of "Mapping:HowTo:Realistic Windows"
Majkifajki (talk | contribs) (First version of realistic windows article) |
|||
| Line 7: | Line 7: | ||
| − | Let start with finding good window texture - I like this one: | + | Let start with finding a good window texture - I like this one: |
[[File:Realisticwindows3.jpg|thumb|center|400px]] | [[File:Realisticwindows3.jpg|thumb|center|400px]] | ||
| − | Now we have to create special version of our texture using alpha channel. These areas will be casting reflection. We want | + | Now we have to create a special version of our texture using alpha channel. These areas will be casting reflection. We only want the glass part to make a reflection, not the window frame. We can do it in GIMP or any other professional image editor. I'll use GIMP. |
[[File:Realisticwindows1.jpeg|thumb|Chessboard means that part of the image is 100% transparent]] | [[File:Realisticwindows1.jpeg|thumb|Chessboard means that part of the image is 100% transparent]] | ||
| − | Just take the image of the window, add an alpha channel, select all the glass | + | Just take the image of the window, add an alpha channel, select all the glass parts and hit the delete key. Now it looks like the glass is gone but it's not! It's just 100% transparent. Save as .tga and that's it for the texture. The "transparent areas" will react with shader - that's why we need them - to point out which parts of the window we want to shine. |
| − | Now we have our window texture with glass areas covered with alpha channel | + | Now that we have our window texture with glass areas covered with alpha channel it's to the reflection image. |
| Line 21: | Line 21: | ||
'''REFLECTION''' | '''REFLECTION''' | ||
| − | Reflection image can be easily created by making screenshot in game of area | + | Reflection image can be easily created by making a screenshot in game of the area the window "sees". Scale it down to 128x128 pixels (you won't need higher resolution) and convert into black and white. As an example: |
| Line 27: | Line 27: | ||
| − | It looks weird, but it will be | + | It looks weird, but it will only be used to simulate reflection. |
'''SHADER''' | '''SHADER''' | ||
| Line 59: | Line 59: | ||
| − | That's the simplest part of the job. Create Brush, select one face, apply texture with shader ( | + | That's the simplest part of the job. Create Brush, select one face, apply texture with shader (you will recognize it by white outline), fit it and compile! |
Revision as of 04:58, 24 August 2011
Creating realistic windows in Urban Terror is fairly easy, but little complex and requires some work. What we will need is:
- Window texture modified into Special version of this texture with alpha channel
- Special image for creating reflection itself
- Shader for getting all this things to work
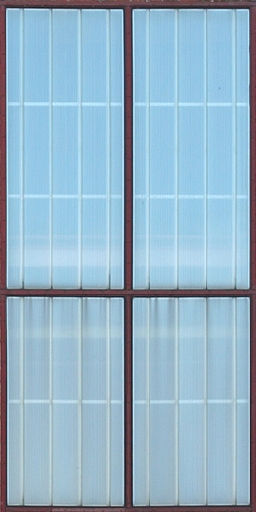
Let start with finding a good window texture - I like this one:
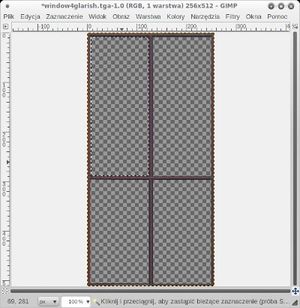
Now we have to create a special version of our texture using alpha channel. These areas will be casting reflection. We only want the glass part to make a reflection, not the window frame. We can do it in GIMP or any other professional image editor. I'll use GIMP.
Just take the image of the window, add an alpha channel, select all the glass parts and hit the delete key. Now it looks like the glass is gone but it's not! It's just 100% transparent. Save as .tga and that's it for the texture. The "transparent areas" will react with shader - that's why we need them - to point out which parts of the window we want to shine.
Now that we have our window texture with glass areas covered with alpha channel it's to the reflection image.
REFLECTION
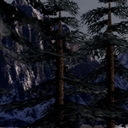
Reflection image can be easily created by making a screenshot in game of the area the window "sees". Scale it down to 128x128 pixels (you won't need higher resolution) and convert into black and white. As an example:
It looks weird, but it will only be used to simulate reflection.
SHADER
Simplest shader You can use is that:
textures/your_map/window
{
  {
    map textures/your_map/window.tga  [adds the window texture without paying attention to alpha. You will see the glass part of the windows, too]
  }
  {
    map textures/your_map/reflectionimage.tga [adds reflection over the whole image]
    tcgen environment
    blendFunc GL_ONE GL_ONE
  }
  {
    map textures/your_map/window.tga  [adds the window texture again on top of everything but this time with alpha. This means your window frame will be pasted over the reflection but the glass part is 100% transparent, so you will still see the reflection here.]
    blendFunc GL_SRC_ALPHA GL_ONE_MINUS_SRC_ALPHA
  }
  {
    map $lightmap  [adds light and shadows]
    blendfunc GL_DST_COLOR GL_SRC_COLOR
  }
}
BRUSHWORK
That's the simplest part of the job. Create Brush, select one face, apply texture with shader (you will recognize it by white outline), fit it and compile!
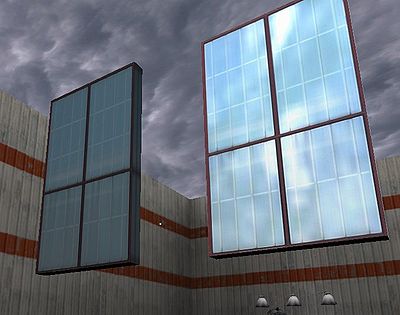
After that You will get window with reflection, instead of non-shiny, dull texture.


