Difference between revisions of "Using the cubemap probe entity"
| Line 46: | Line 46: | ||
Lastly, when using fancywater or cheapwater place a cubemap_probe 16-32 units above the water surface for the best reflection of the under-side of the water. | Lastly, when using fancywater or cheapwater place a cubemap_probe 16-32 units above the water surface for the best reflection of the under-side of the water. | ||
| − | Article reproduced from [http://www.gotdelirium.com/site/articles_11.html | + | Article reproduced from [http://www.gotdelirium.com/site/articles_11.html www.gotdelirium.com] with kind permission of the author. |
Revision as of 08:19, 26 November 2011
This is a short article on how the cubemap_probe works for Urban Terror's new Bumpy features. I must stress that this only works with any of the FS_q3map2_radbump.exes and which will only work when -radbump is used in the compile. If you do not have FS_q3map2_radbump.exe then you can find the latest update in the first post in this thread on the UrT forums, its a windows program but can run with linux under wine.
You will also need to add this to the bottom of your definition file for GTK, you should find this in /scripts/urbanterror.def
//====================
// Cube Map Probe
//====================
/*QUAKED cubemap_probe (1.0 0.5 0.8)(-8 -8 -8) (8 8 8)
Location of camera for cube map for specular mapping. Place at head height in the centre of an area. There are no keys.
*/
Just as a bit of trivia, I suggested to BladeKiller on IRC while she was writing up this entity for 27 to make it pink for laughs, and she made it pink :)
First off, you might already know what a cubemap_probe does and how it works but if you don't, think of the cubemap_probe as a camera. In which from each of the 6 sides of the cube it takes a 128x128(I think) image of each of the 6 angles from the cube. These images will be used to as the specularity image which is reflected off of a texture, how visible these specular images are is dependant on how high or low the specularity of the normal map is. This gives the illusion that your normal maps are reflecting the world behind you, but they're just using images which have been 'framed' from the angles of your cubemap_probes. When placing these cubemap probes around your map you need to remember to not put in too many, one per atrium/hallway is enough. I normally think of it as one per 768 units or so if your map has a few open bits (eg ut4_oaks).
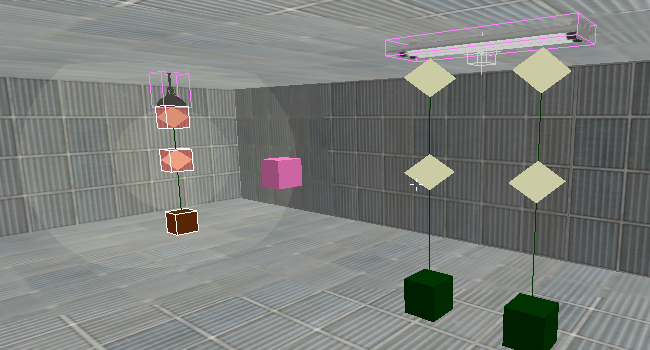
I used a light setup which in my opinion produces the best specular lighting from bumpy textures.
The top light points to the info_null with a light value of 100, the bottom light doesn't point to any other entity and has a light value of 50. With this arrangement you have the top light show the light coming from the model above and the bottom light giving light to walls and surfaces which the light above doesn't.
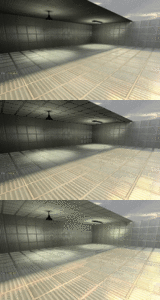
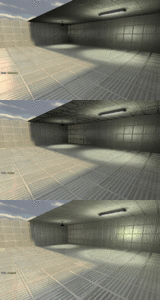
First off I started with tests with and without using the cubemap_probe, then I did a compile using a cubemap_probe with 8 bounces. (fair warning, these images are 2-3mb each)
From 2 different angles you can see a major difference in the specularity in each image pane.
The "nocube" refers to just a normal compile which includes the -radbump switch but has no cubemap_probe entity in the map. In this case the specularity images will be from the up,dn,lf,rt,ft,bk images of the skybox which is defined in the "skyparms" line of the sky shader, if there is no sky shader the specularity image will be a flare like image(educated guess from an observation). In the "nocube" shots you can see that the specularity of the glass window texture is only defined around where the light entities are, not where all the light is reaching.
The "cube" refers to a compile which includes a cubemap_probe entity in the .map with a -radbump compile, it has been said to place the entity at head height(which in Urban Terror is 72u) I find placing it at eye level(64u) produces a nicer set of specular images. Here you can see that the specular from the image is being spread to throughout where the light is reaching, if there was any detail in this map(instead of a few plane walls) the specular images would have details from around where the cubemap_probe is.
The "cube8" refers to a compile which includes a cubemap_probe entity and has been compiled with -radbump and -bounce 8, here you can see that not only is the specularity of the image visible throughout where the light is, but it is a lot clearer where the light source is coming from. The specularity increases quite a lot depending on how many bounces you do.
http://gotdelirium.com/maps/spec.gif A cubemap_probe is in both of these images, the only thing which separates the 2 is one is compiled with 8 bounces and the other with none. The one without any bounces as you can see has definition on where the light source is and where the light is coming from. The image with 8 bounces shows the same thing except the specularity from those lights has increased quite significantly on the walls and floor close-by. Because the specularity level on the normal maps on this image is a lot higher the specular in these images look quite ugly, but a texture with a lower specular level would have a more suttle specular reflection and would look a lot nicer with 8 bounces.
A few things to note are that the more cubemap_probes you have in your map the longer it will take to load, remember that for every cubemap_probe you have there will be 6 images stored in your .bsp, so 10 would mean 60 more images to load while loading your map. I don't go over 20, I did in one beta of facade which I think I placed about 60 and the map took a longer time to load... I place them at 64u off the ground of the atrium though it doesn't mean you should too. You should find out what works best for your map. Lastly, when using fancywater or cheapwater place a cubemap_probe 16-32 units above the water surface for the best reflection of the under-side of the water.
Article reproduced from www.gotdelirium.com with kind permission of the author.


