Difference between revisions of "Mapping:Adding a camera to your map"
(Created page with "Portals are actually fairly easy. A portal consists of 3 to 4 objects. First you have an object is a brush you want to be the "viewer". Then you have 2 entities, the misc_po...") |
|||
| (15 intermediate revisions by 3 users not shown) | |||
| Line 1: | Line 1: | ||
| − | |||
| − | |||
A portal consists of 3 to 4 objects. | A portal consists of 3 to 4 objects. | ||
First you have an object is a brush you want to be the "viewer". | First you have an object is a brush you want to be the "viewer". | ||
| − | Then you have 2 entities, the misc_portal_surface and the misc_portal_camera. | + | Then you have 2 entities, the '''misc_portal_surface''' and the '''misc_portal_camera'''. |
| + | |||
| + | This tutorial also uses an entity of '''target_position''' which is used to aim your camera, although you can give your '''misc_portal_camera''' an angle to aim instead. | ||
| + | |||
| + | ==Images== | ||
| + | Download the following zip file [http://www.custommapmakers.org/storage/download/cameratextures.zip Images] it contains 2 images. Extract them tore these in your images folder. | ||
| + | |||
| + | ==Shader== | ||
| + | Add the following shader to your shader file, you should change the paths to match your map. | ||
| + | |||
| + | textures/myfirstmap/tvscreen | ||
| + | { | ||
| + | qer_editorimage textures/myfirstmap/monitor.tga | ||
| + | q3map_lightimage textures/myfirstmap/monitor_colour.tga | ||
| + | q3map_surfacelight 1200 | ||
| + | portal | ||
| + | { | ||
| + | map textures/myfirstmap/monitor_colour.tga | ||
| + | blendFunc filter | ||
| + | depthWrite | ||
| + | } | ||
| + | { | ||
| + | map textures/myfirstmap/monitor_colour.tga | ||
| + | blendFunc GL_SRC_ALPHA GL_ONE_MINUS_SRC_ALPHA | ||
| + | alphagen portal 256 | ||
| + | rgbGen identityLighting | ||
| + | } | ||
| + | { | ||
| + | map textures/myfirstmap/monitor.tga | ||
| + | blendfunc blend | ||
| + | } | ||
| + | { | ||
| + | map $lightmap | ||
| + | blendfunc filter | ||
| + | } | ||
| + | } | ||
| + | |||
| + | ==Create a TV screen== | ||
| + | {| width="100%" style="padding-left:5%;" | ||
| + | |style="padding-right:5%;vertical-align:top"| | ||
| + | Create a simple (detail) brush in your map where you'd like your TV to be. | ||
| + | |||
| + | Texture the top and sides, perhaps the bottom if anyone is likely to look there. | ||
| + | |||
| + | |||
| + | Select the front face, the actual screen of your TV | ||
| + | |||
| + | |||
| + | Apply the "tvscreen" shader to this face and fit it to size. | ||
| + | |||
| + | | | ||
| + | |||
| + | |||
| + | [[File:Tut camera create tv.png|500px]] | ||
| + | |||
| + | |||
| + | [[File:Tut camera texture tv.png|500px]] | ||
| + | |||
| + | |||
| + | [[File:Tut camera select face.png|500px]] | ||
| + | |||
| + | |||
| + | [[File:Tut camera front.png|500px]] | ||
| + | |} | ||
| + | |||
| + | ==Create the entities== | ||
| + | {| width="100%" style="padding-left:5%;" | ||
| + | |style="padding-right:5%;vertical-align:top"| | ||
| + | |||
| + | First of all create an entity of misc_portal_surface and place it within 64 units of your "tv scren" surface. | ||
| + | |||
| + | Open the entity inspector with the misc_portal_surface selected (Press N) and enter | ||
| + | |||
| + | key : target | ||
| + | value : screen1 | ||
| + | |||
| + | |||
| + | |||
| + | Then create a misc_portal_camera and place it in the other room. | ||
| + | |||
| + | Again, with this selected press N to open the entity inspector and enter | ||
| + | |||
| + | key : targetname | ||
| + | value : screen1 | ||
| + | |||
| + | key : target | ||
| + | value : camera1 | ||
| + | |||
| + | I am also going to us a target_position to tell the camera where to point. It is also possible to just give the misc_portal_camera an angle, but I find it easier to point it at a target. | ||
| + | |||
| + | Create a target_position where you'd like the camera to point, the values for this entity should be | ||
| + | |||
| + | key : targetname | ||
| + | value : camera1 | ||
| + | |||
| + | |||
| + | This should connect all the entities together and your map should look like this.. | ||
| + | | | ||
| + | [[File:Tut camera item1.png|500px]] | ||
| + | [[File:Tut camera item2.png|500px]] | ||
| + | [[File:Tut camera connected.png|500px]] | ||
| + | |} | ||
| − | + | [[Category:Mapping]] | |
Latest revision as of 15:23, 13 September 2011
A portal consists of 3 to 4 objects.
First you have an object is a brush you want to be the "viewer".
Then you have 2 entities, the misc_portal_surface and the misc_portal_camera.
This tutorial also uses an entity of target_position which is used to aim your camera, although you can give your misc_portal_camera an angle to aim instead.
Images
Download the following zip file Images it contains 2 images. Extract them tore these in your images folder.
Shader
Add the following shader to your shader file, you should change the paths to match your map.
textures/myfirstmap/tvscreen
{
	qer_editorimage textures/myfirstmap/monitor.tga
	q3map_lightimage textures/myfirstmap/monitor_colour.tga
	q3map_surfacelight 1200
	portal
	{
		map textures/myfirstmap/monitor_colour.tga
		blendFunc filter
		depthWrite
	}
	{
		map textures/myfirstmap/monitor_colour.tga
		blendFunc GL_SRC_ALPHA GL_ONE_MINUS_SRC_ALPHA
		alphagen portal 256
		rgbGen identityLighting
	}
	{
		map textures/myfirstmap/monitor.tga
		blendfunc blend
	}
	{
		map $lightmap
		blendfunc filter
	}
}
Create a TV screen
|
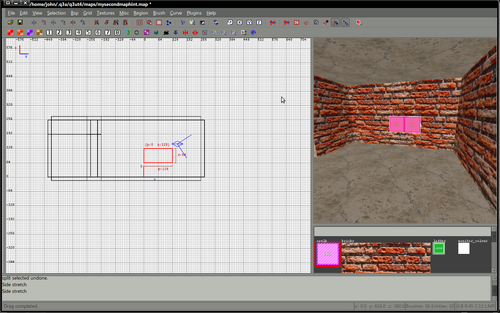
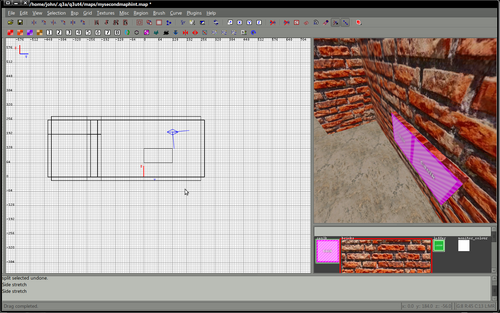
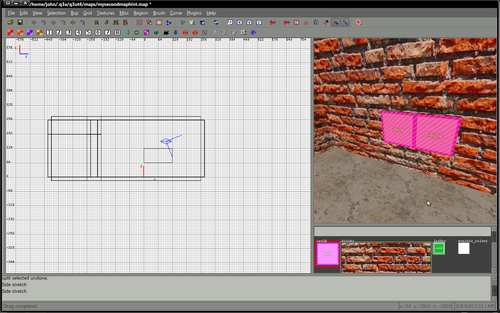
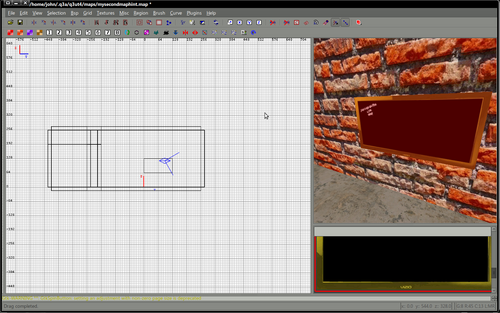
Create a simple (detail) brush in your map where you'd like your TV to be. Texture the top and sides, perhaps the bottom if anyone is likely to look there.
|
Create the entities
|
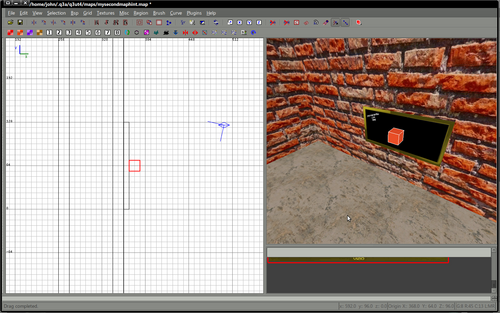
First of all create an entity of misc_portal_surface and place it within 64 units of your "tv scren" surface. Open the entity inspector with the misc_portal_surface selected (Press N) and enter key : target value : screen1
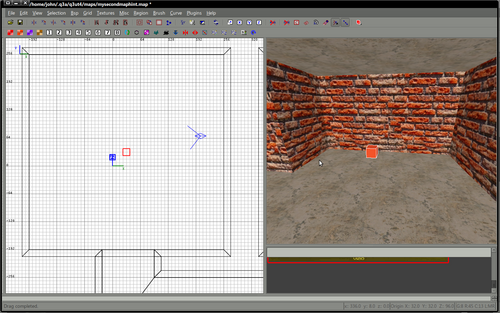
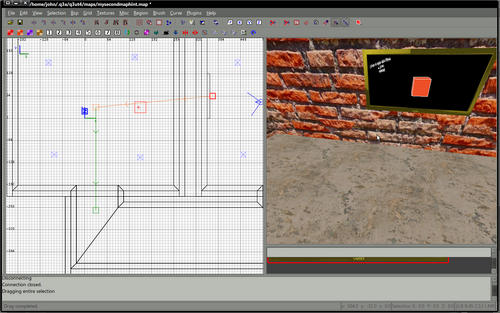
Then create a misc_portal_camera and place it in the other room. Again, with this selected press N to open the entity inspector and enter key : targetname value : screen1 key : target value : camera1 I am also going to us a target_position to tell the camera where to point. It is also possible to just give the misc_portal_camera an angle, but I find it easier to point it at a target. Create a target_position where you'd like the camera to point, the values for this entity should be key : targetname value : camera1
|
